")
Have you ever wondered how professional car detailers can take a faded, five-year-old daily driver and make it look like it just rolled out of a luxury car showroom? Many car owners believe that a quick 10-minute automated car wash or a bucket of soapy water on a Sunday morning is enough to maintain their vehicle's appearance. However, true auto detailing is an entirely different ballgame.
Car detailing is the systematic process of deep cleaning, restoring, and protecting every single surface of your vehicle—both inside and out. It involves specialized tools, precise chemical applications, and a strict step-by-step methodology to prevent swirl marks, scratches, and premature aging of the paint.
In this comprehensive guide, we are pulling back the curtain on the auto detailing industry. Whether you are a beginner looking to maintain your pride and joy, or an aspiring detailer wanting to perfect your craft, here is the exact step-by-step car detailing process used by professionals in 2026.
Phase 1: The Interior Detailing (The Top-Down Approach)
Most amateurs start by washing the exterior of the car. Professionals never do this. If you wash the outside first and then open the doors to blow out dusty carpets and floor mats, all that dirt will settle right back onto your freshly cleaned paint. Always start with the interior.
Step 1: Declutter and Remove Floor Mats
Begin by removing all the trash, personal items, loose change, and wrappers. Take out the floor mats. It is infinitely easier to clean the mats outside the car. Shake them vigorously to remove loose dirt and rocks before vacuuming.
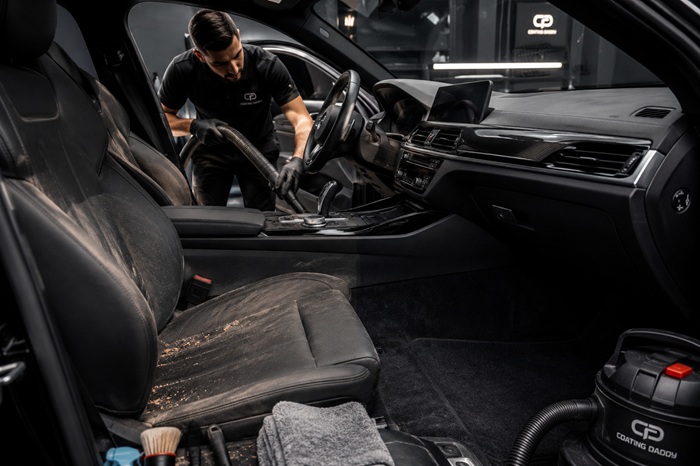
Step 2: Deep Vacuuming
The secret to a perfect interior is a thorough vacuuming job. Dirt and sand act like sandpaper against your fabric seats and carpets, slowly destroying the fibers every time you sit down.
- Start from the top (headliner and seats) and work your way down to the carpets.
- Use a detailing brush to agitate the carpets while vacuuming. This "dry brushing" technique lifts deeply embedded sand that the vacuum alone can't reach.
[Detail Like a Pro!] Don't let embedded dirt ruin your car's interior. Get ultimate suction power on the go. Buy the Coating Daddy Portable Vacuum Cleaner Here
Step 3: Cleaning Hard Surfaces and Crevices
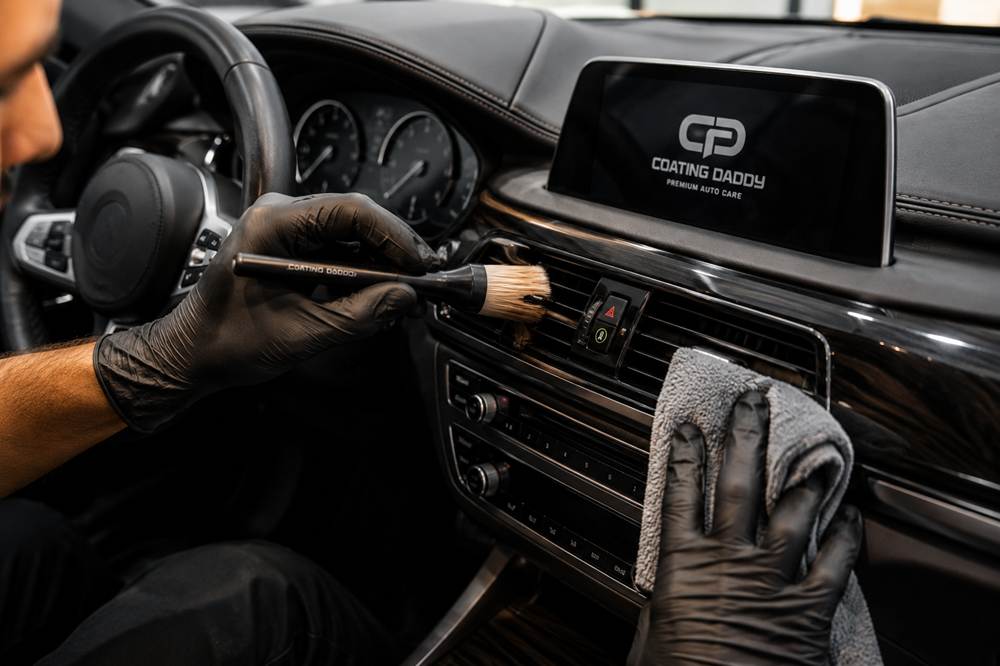
Your dashboard, center console, steering wheel, and door panels are covered in body oils, sweat, and dust.
- Never spray cleaner directly onto the dashboard, as it can overspray onto the windshield. Instead, spray a premium All-Purpose Cleaner (APC) onto a clean Microfiber Towel.
- Wipe down all the plastics, vinyl, and leather.
- For the AC vents and tight buttons, use a soft-bristled detailing brush to agitate the cleaner, then wipe it away.
[Image Idea: A close-up of a professional detailer using a Coating Daddy Detailing Brush on the AC vents with a microfiber towel in the other hand.]
[Upgrade Your Cleaning Arsenal!] Safely clean every button, vent, and leather stitch without scratching. Shop Coating Daddy Detailing Brushes Buy Coating Daddy All-Purpose Cleaner
Step 4: Interior Glass Cleaning
The inside of your windshield builds up a hazy film from plastic off-gassing and breath condensation. Use a dedicated glass cleaner and a specialized glass microfiber towel. Spray the towel, wipe the glass in a box pattern (edges first, then the middle), and flip the towel to a dry side to buff away any streaks.
Phase 2: Wheels, Tires, and Wheel Wells
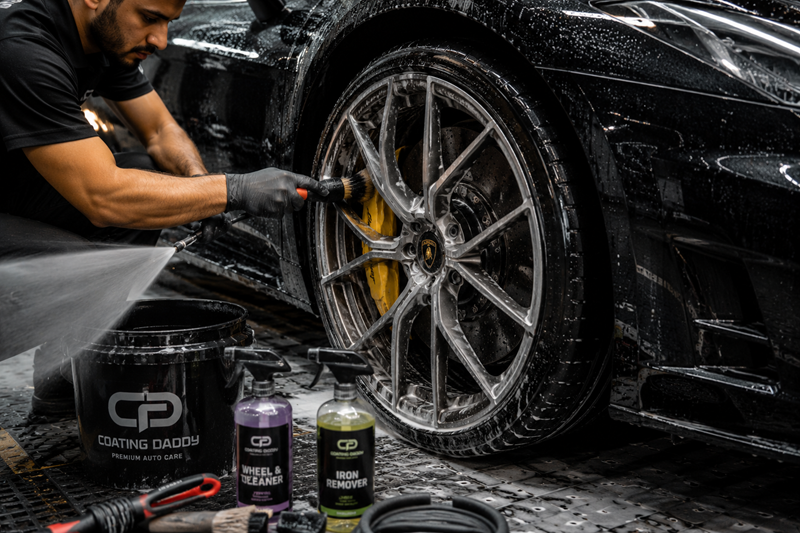
With the interior looking flawless and doors safely shut, we move to the dirtiest part of any vehicle: the wheels. Wheels are covered in heavy brake dust, road tar, and iron particles. You must clean them first so that the harsh chemicals and splashing grime do not get onto your clean paint later.
Step 5: Applying Wheel Cleaner & Agitation
- Work on one wheel at a time to prevent the cleaner from drying out.
- Spray a heavy-duty wheel cleaner generously over the alloy rims and the rubber tire.
- Use a dedicated Wheel Cleaning Brush to reach deep into the wheel barrels.
- Scrub the face of the spokes with a softer brush, and use a stiff brush for the rubber tire to remove the brown oxidation (tire blooming).
[Keep Your Alloys Shining!] Melt away heavy brake dust and reach the deepest parts of your rims effortlessly. Buy the Coating Daddy Wheel Cleaning Brush
Rinse the wheel thoroughly with a pressure washer before moving to the next one.
Phase 3: The Exterior Wash (Scratch-Free Method)
This is where 90% of car owners ruin their paint. Using a single bucket and a dirty sponge is a guaranteed way to install swirl marks and spiderweb scratches across your clear coat. Here is the professional, scratch-free wash method.
Step 6: The Snow Foam Pre-Wash
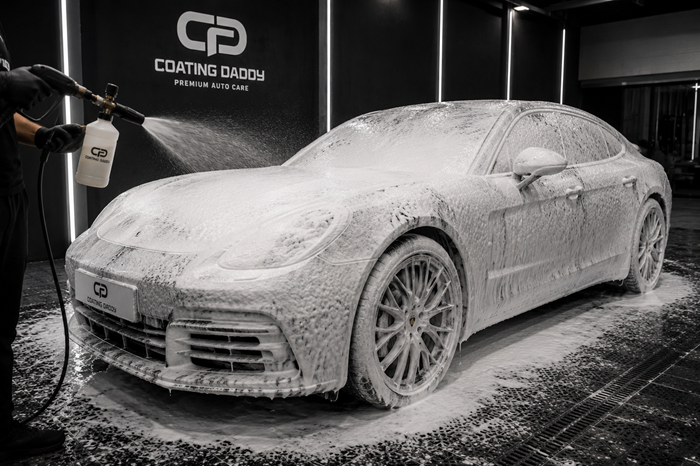
Never touch dry paint. Before making contact with the car, professionals use a Foam Cannon attached to a pressure washer.
- Load the cannon with a high-lubricity foam shampoo and blanket the entire car in thick, shaving-cream-like foam.
- Let it dwell for 5 minutes. The foam encapsulates the dirt, softens bird droppings, and pulls the grime off the paint safely.
- Rinse the car completely.
[Experience the Ultimate Snow Foam!] Thick, luxurious foam that lifts dirt safely and leaves a brilliant shine. Buy Coating Daddy Foam Car Wash Shampoo (500ml / 1 Liter)
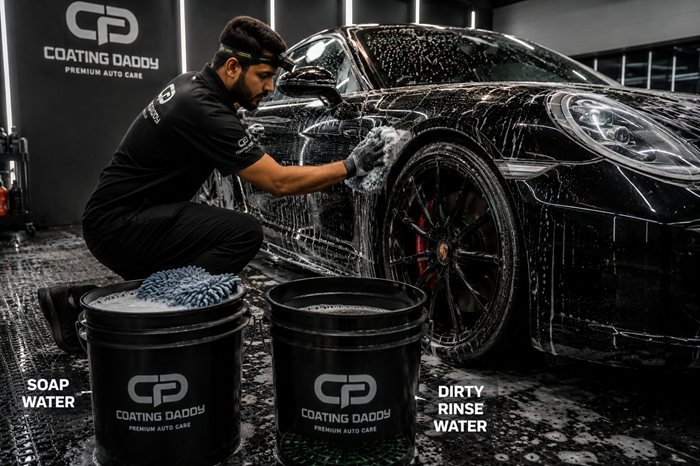
Step 7: The Two-Bucket Contact Wash
Now it is time for the contact wash. You will need two buckets:
- The Wash Bucket: Filled with water and premium Car Wash Shampoo.
- The Rinse Bucket: Filled with plain, clean water.
Dip your Microfiber Wash Mitt into the soapy wash bucket. Wash one panel of the car (e.g., the hood) using straight lines—never in circles. Before you get more soap, dunk the dirty mitt into the Rinse Bucket and scrub it against a grit guard to release the trapped dirt. Then, dip it back into the wash bucket and move to the next panel. This ensures you never rub dirt back into the paint.
[Image Idea: A split-screen graphic showing the Two-Bucket Method (Wash Bucket with Soap vs. Rinse Bucket with dirty water).]
Step 8: Safe Drying
Drying the car with an old bath towel or a water blade will cause scratches. Professionals use ultra-plush, high-GSM microfiber drying towels. Gently lay the towel over the wet panel and pull it across, or pat it dry.
[Dry Without Scratching!] Absorb massive amounts of water instantly with our premium scratch-free towels. Shop 360 GSM Microfiber Terry Car Towels
Phase 4: Paint Decontamination and Correction
Even after a thorough wash, your paint might still feel rough like sandpaper. This is due to embedded contaminants like tree sap, rail dust, and industrial fallout. Furthermore, the paint likely has microscopic swirl marks from years of improper washing.
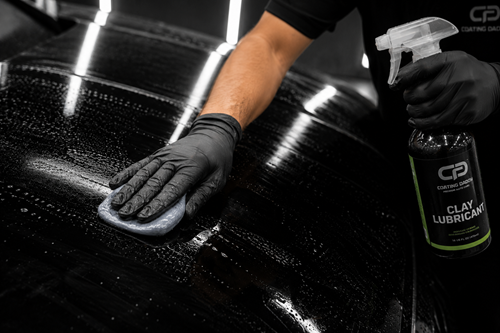
Step 9: Clay Bar Decontamination
Spray a clay lubricant (or diluted car wash soap) onto a panel and gently rub an automotive clay bar over the wet surface. The clay acts as a magnet, pulling out microscopic contaminants stuck in the clear coat pores. Once done, the paint will feel as smooth as glass.
Step 10: Machine Polishing (Paint Correction)
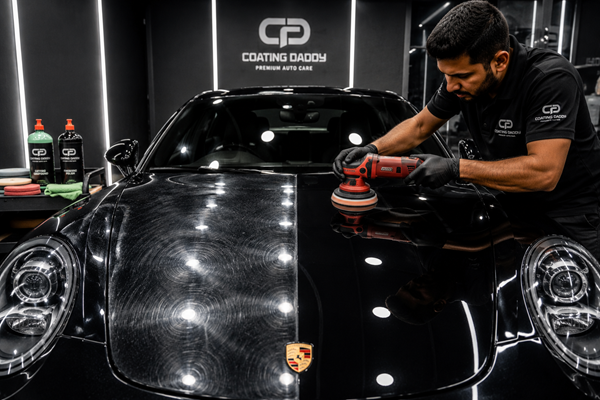
This is the most transformative step in detailing. Paint correction removes a microscopic fraction of the clear coat to level out scratches, restoring a mirror-like reflection.
- Professionals use a Dual Action (DA) Polisher. Unlike older rotary polishers that can burn through paint easily, DA polishers oscillate and rotate simultaneously, making them incredibly safe even for beginners.
- Cutting Phase: If the car has heavy scratches, pair the DA Polisher with a Woolen Heavy Cutting Pad or a White Heavy Cutting Foam Pad and a heavy compound.
- Polishing Phase: To restore the ultimate gloss, switch to a Medium Orange/Yellow Polishing Pad and a finishing polish.
[Image Idea: An action shot of a detailer using a Red 21mm Dual Action Polisher on a car hood under bright detailing lights, showing a stark contrast between the dull unpolished side and the glossy polished side.]
[Master Paint Correction at Home!] Equip yourself with the exact machines and pads the professionals use. Buy the 21mm Red Dual Action Polisher Explore our Range of 3-Inch & 6-Inch Cutting and Polishing Pads
Step 11: Touch-Up & Trim Restoration (Optional)
Before sealing the paint, inspect the car for deep rock chips or bumper scuffs. Use an exact-match aerosol spray paint to seamlessly touch up the damage. If your plastic trims have faded to a dull grey, now is the time to apply a trim restorer.
[Fix Scuffs in Minutes!] Restore your bumper's glory with our premium automotive spray paints. Shop Pearl White Spray Paint | Shop Matte Black Spray Paint
Phase 5: Protection and The Final Touches
Polishing leaves the paint completely bare and vulnerable to UV rays, acid rain, and bird droppings. You must lock in that flawless shine with a protective layer.
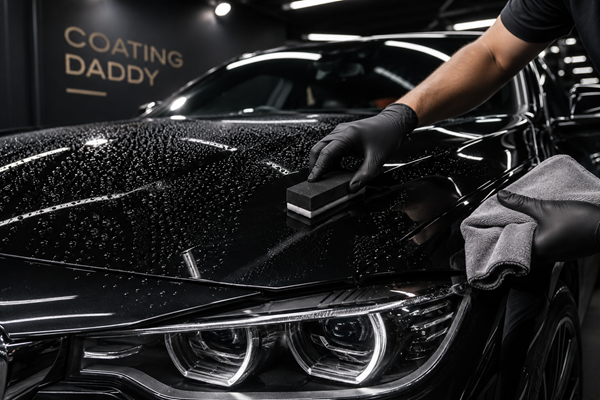
Step 12: Applying Ceramic Coating or Wax
While traditional carnauba waxes provide a warm glow, they only last for a few weeks. In 2026, professionals rely on 9H Nano Ceramic Coatings.
- A ceramic coating forms a liquid-glass shield over your clear coat, creating an incredibly hard, hydrophobic (water-repelling) surface.
- Apply the coating in a cross-hatch pattern using a suede applicator block. Wait for it to "flash" (rainbow effect), and gently buff it off with a clean microfiber towel.
- A high-quality ceramic coating like Nasiol ZR53 provides up to 3 years of extreme protection and makes future washing effortless.
[Lock in the Shine!] Get years of diamond-like protection and ultimate water beading. Buy Nasiol ZR53 Ceramic Coating Today
Step 13: Tire Dressing and Final Inspection
Apply a premium, no-sling tire gel to the rubber walls using a foam applicator. This gives the tires a deep, dark, rich black finish that contrasts beautifully with the freshly polished paint. Walk around the vehicle with a detailing pen light to ensure no polish residue or smudges are left behind.
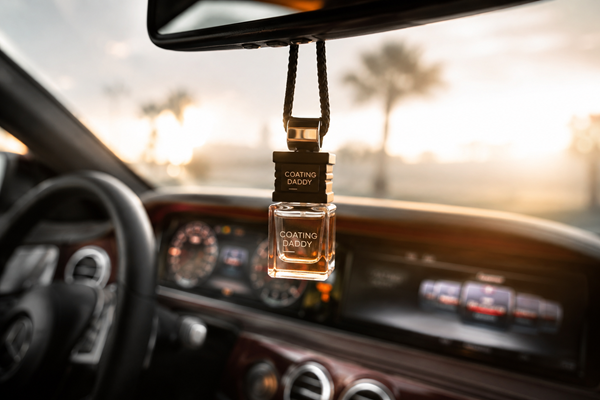
Step 14: The Signature Scent (The Professional Touch)
A freshly detailed car isn’t fully finished until the cabin smells as luxurious as the exterior looks. Over time, cars absorb damp odors, sweat, and fast food smells. Instead of cheap paper trees, professionals finish their detailing process by hanging or placing a premium, long-lasting car perfume inside the cabin.
[Image Idea: A stylish, aesthetic shot of a 'The Fumes' perfume bottle hanging elegantly from a car's rear-view mirror.]
[The Ultimate Finishing Touch!] Eliminate bad odors and give your car interior a luxury, long-lasting vibe. Order 'The Fumes' Premium Car Perfume Now
Conclusion
Car detailing is an art form backed by science. While it may seem like a long and tedious process, following this professional step-by-step guide guarantees results that will turn heads wherever you drive.
You do not need to spend thousands of dollars at a detailing studio. By investing in the right machines, quality chemicals, and proper techniques, you can achieve and maintain that flawless, showroom-fresh finish right in your own driveway.
Ready to start your detailing journey? Whether you need high-foaming shampoos, advanced dual-action polishers, or premium ceramic coatings, explore the complete range of professional car care products at Coating Daddy.